A number of old recipes pay homage to Alaska as it existed in the early American cultural imagination. The Alaska cocktail, developed during The Gold Rush, is one. Baked Alaska, with its warm exterior and cold mountain of ice cream inside, is another. I am a firm believer, however, that as Alaskans we should make these Alaskana recipes our own.
First, a little history: according to the cooking dictionary What’s Cooking America, Charles Ranhofer, a French chef at Delmonico’s Restaurant in New York, created a dessert made with banana ice cream, a biscuit base, and toasted meringue to celebrate The Alaska Purchase in 1867. In his cookbook, The Epicurean, published in 1864, he called it an “Alaska, Florida.” A similar recipe appears as “Baked Alaska” in The Original Fannie Farmer 1896 Cookbook.
To develop a truly Alaska-style baked Alaska, I dialed up my friend Elissa Brown, owner of Wild Scoops ice cream in Anchorage, and got some advice on dealing with ice cream. Her shops serve baked Alaska cones covered in toasted marshmallow meringue that are a shoutout to the old school recipe, so she also shared a great meringue recipe that really sticks to ice cream. We spent a day in the kitchen messing around and came up with a dish that is a project but requires more time than skill. The result is a show-stopping dessert.
A few things to note: I used my favorite sourdough brownie recipe as a base, but any brownie recipe, including boxed brownie mix, will do. A simplified version of this recipe can be made in individual portions using brownie rounds cut out with a large biscuit cutter or glass, and a scoop of ice cream on top, covered in meringue and torched. I strongly advise against using sorbet. I tried this and found it doesn’t refreeze well and tends to crumble when you cut it. And it’s best not to make it too big. Some versions of baked Alaska call for toasting the meringue under a broiler but when we tested, we found that the ice cream melted too quickly. It’s absolutely worth tracking down a kitchen torch for this. In a pinch, you can also use a regular blow torch, but take care not to set the meringue on fire. You will also need a 7- or 8-inch diameter Pyrex or metal bowl that holds at least 1½ quarts, a standing mixer with a whisk attachment, and a candy thermometer. And, finally, if you aren’t a fan of chocolate, you can make this recipe using a round of sheet cake of any variety as a base.
(This recipe originally appeared in Edible Alaska. Subscribe!)
FOR THE CAKE
- 3 pints ice cream that pairs with chocolate (there will be about ½ pint left over)
- 1 pan of un-cut sourdough brownies (link below) or brownies from your favorite recipe, cooled
FOR THE MERINGUE
- 1/3 cup water
- ¾ cup sugar
- 2/3 cup light corn syrup
- 3 egg whites
- ½ teaspoon cream of tartar
- 1 teaspoon vanilla extract
To begin, take the small mixing bowl (see note above on size), turn it upside down on a piece of parchment paper, and trace it. Cut out the circle and set it aside. Clear a place in your freezer big enough to accommodate the bowl. It must be able to sit level in the freezer.
At least a day before you plan to serve your dessert, bake your brownies. It’s important that the brownies are totally cool when you work with them. (I find they are sturdiest about 10 hours after baking.) While they are cooling, build the ice cream body. Place the pint of whichever flavor of ice cream you’d like to use first (this will be the top of your baked Alaska mountain) in the fridge for 1 hour. Elissa says to look for a peanut butter-like texture. Line your bowl with 2 pieces of plastic wrap.
Once the ice cream in the fridge is soft, quickly spread ½ the pint in the bottom of your bowl and place it back in the freezer. It needs to refreeze for about 1 hour before you add the next layer. Repeat the step with the 2 other flavors of ice cream, except with those, use the whole pint. (If you want to make the layers really even, you could eat about 5 big bites of the second flavor.)
Before you refreeze your last layer, lay your parchment circle on top of the pan of brownies and cut out the base of your baked Alaska with a sharp knife. Carefully place it on top of the ice cream in the bowl, trimming a little if it’s a little too large. Cover the whole thing with plastic wrap and freeze overnight or up to 2 weeks.
At least a few hours ahead of when you plan to serve your dessert, make Elissa’s marshmallow meringue. In a medium saucepan, combine water, sugar, and corn syrup. Stir gently to combine. Insert a candy thermometer and set over medium-high heat. DO NOT stir the sugar as it cooks or it will form crystals.
When the syrup begins to form large bubbles and the thermometer reads 225°–230° F, place your egg whites and cream of tartar in the bowl of a standing mixer fitted with a whisk attachment, and beat into soft peaks. This should take 3–4 minutes.
By the time the whites are whipped, the sugar syrup should be 240° F. Remove it from the heat, and with the mixer running on low, carefully pour it, in a steady stream, into the whites. They will deflate slightly, but as the sugar incorporates, they will thicken, turn white, and begin to fluff up. Continue to whip at medium speed for a minute, boost to high, add the vanilla, mix until well combined, and return to medium speed for 6–7 more minutes until whites are very thick and glossy. The meringue can be made ahead and stored in an airtight container at room temperature for up to 2 weeks.
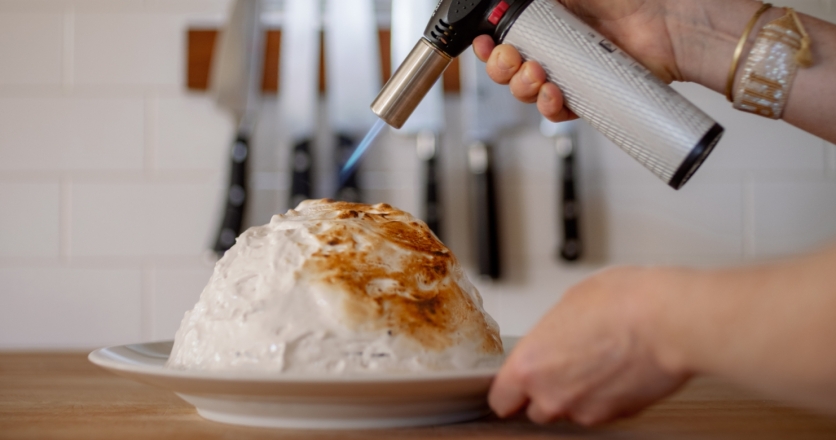
At least 90 minutes before you’re ready to serve, take the bowl of ice cream and brownie from the freezer and quickly dip it in hot water for about 15 seconds, taking care not to get water on the cake layer. Invert the bowl on a serving plate and remove plastic. It should easily unmold. Place it back in the freezer for at least 30 minutes. Roughly 30 minutes before serving, remove it from the freezer. Working quickly, cover it with a healthy layer of meringue, using your spatula to make peaks. Return to the freezer for at least 15 minutes. When you are ready to serve, quickly toast the fluff with the kitchen torch. It’s okay to blacken the edges a little. Serve immediately. To slice, use a knife that has been dipped in very hot water.
Recipe developed by Julia O’Malley with Elissa Brown of Wild Scoops.